Interactive computing with Jupyterlab
Jupyter is a service that allows scientists to work with "notebooks" - a single document that contains live code, output of the code, narrative text, charts and figures all together.
Reproducible science
Often times, you wish you could get an idea of how the author of a blogpost/software library/paper performed their computation and arrived at their result. At times, the process is more educating than the result itself. Jupyter notebook could be an answer to that wish.
It's simple - it works like a digital notebook that happens to have places where you can insert your code, and see its output interactively. You can add notes just like you normally would on a notebook. At the end, you can send that one notebook to anyone who wants to retrace your steps. Sending your paper for review? Asking your peers to look at your code? just send your notebook so they can follow along step-by-step.
How does it look?
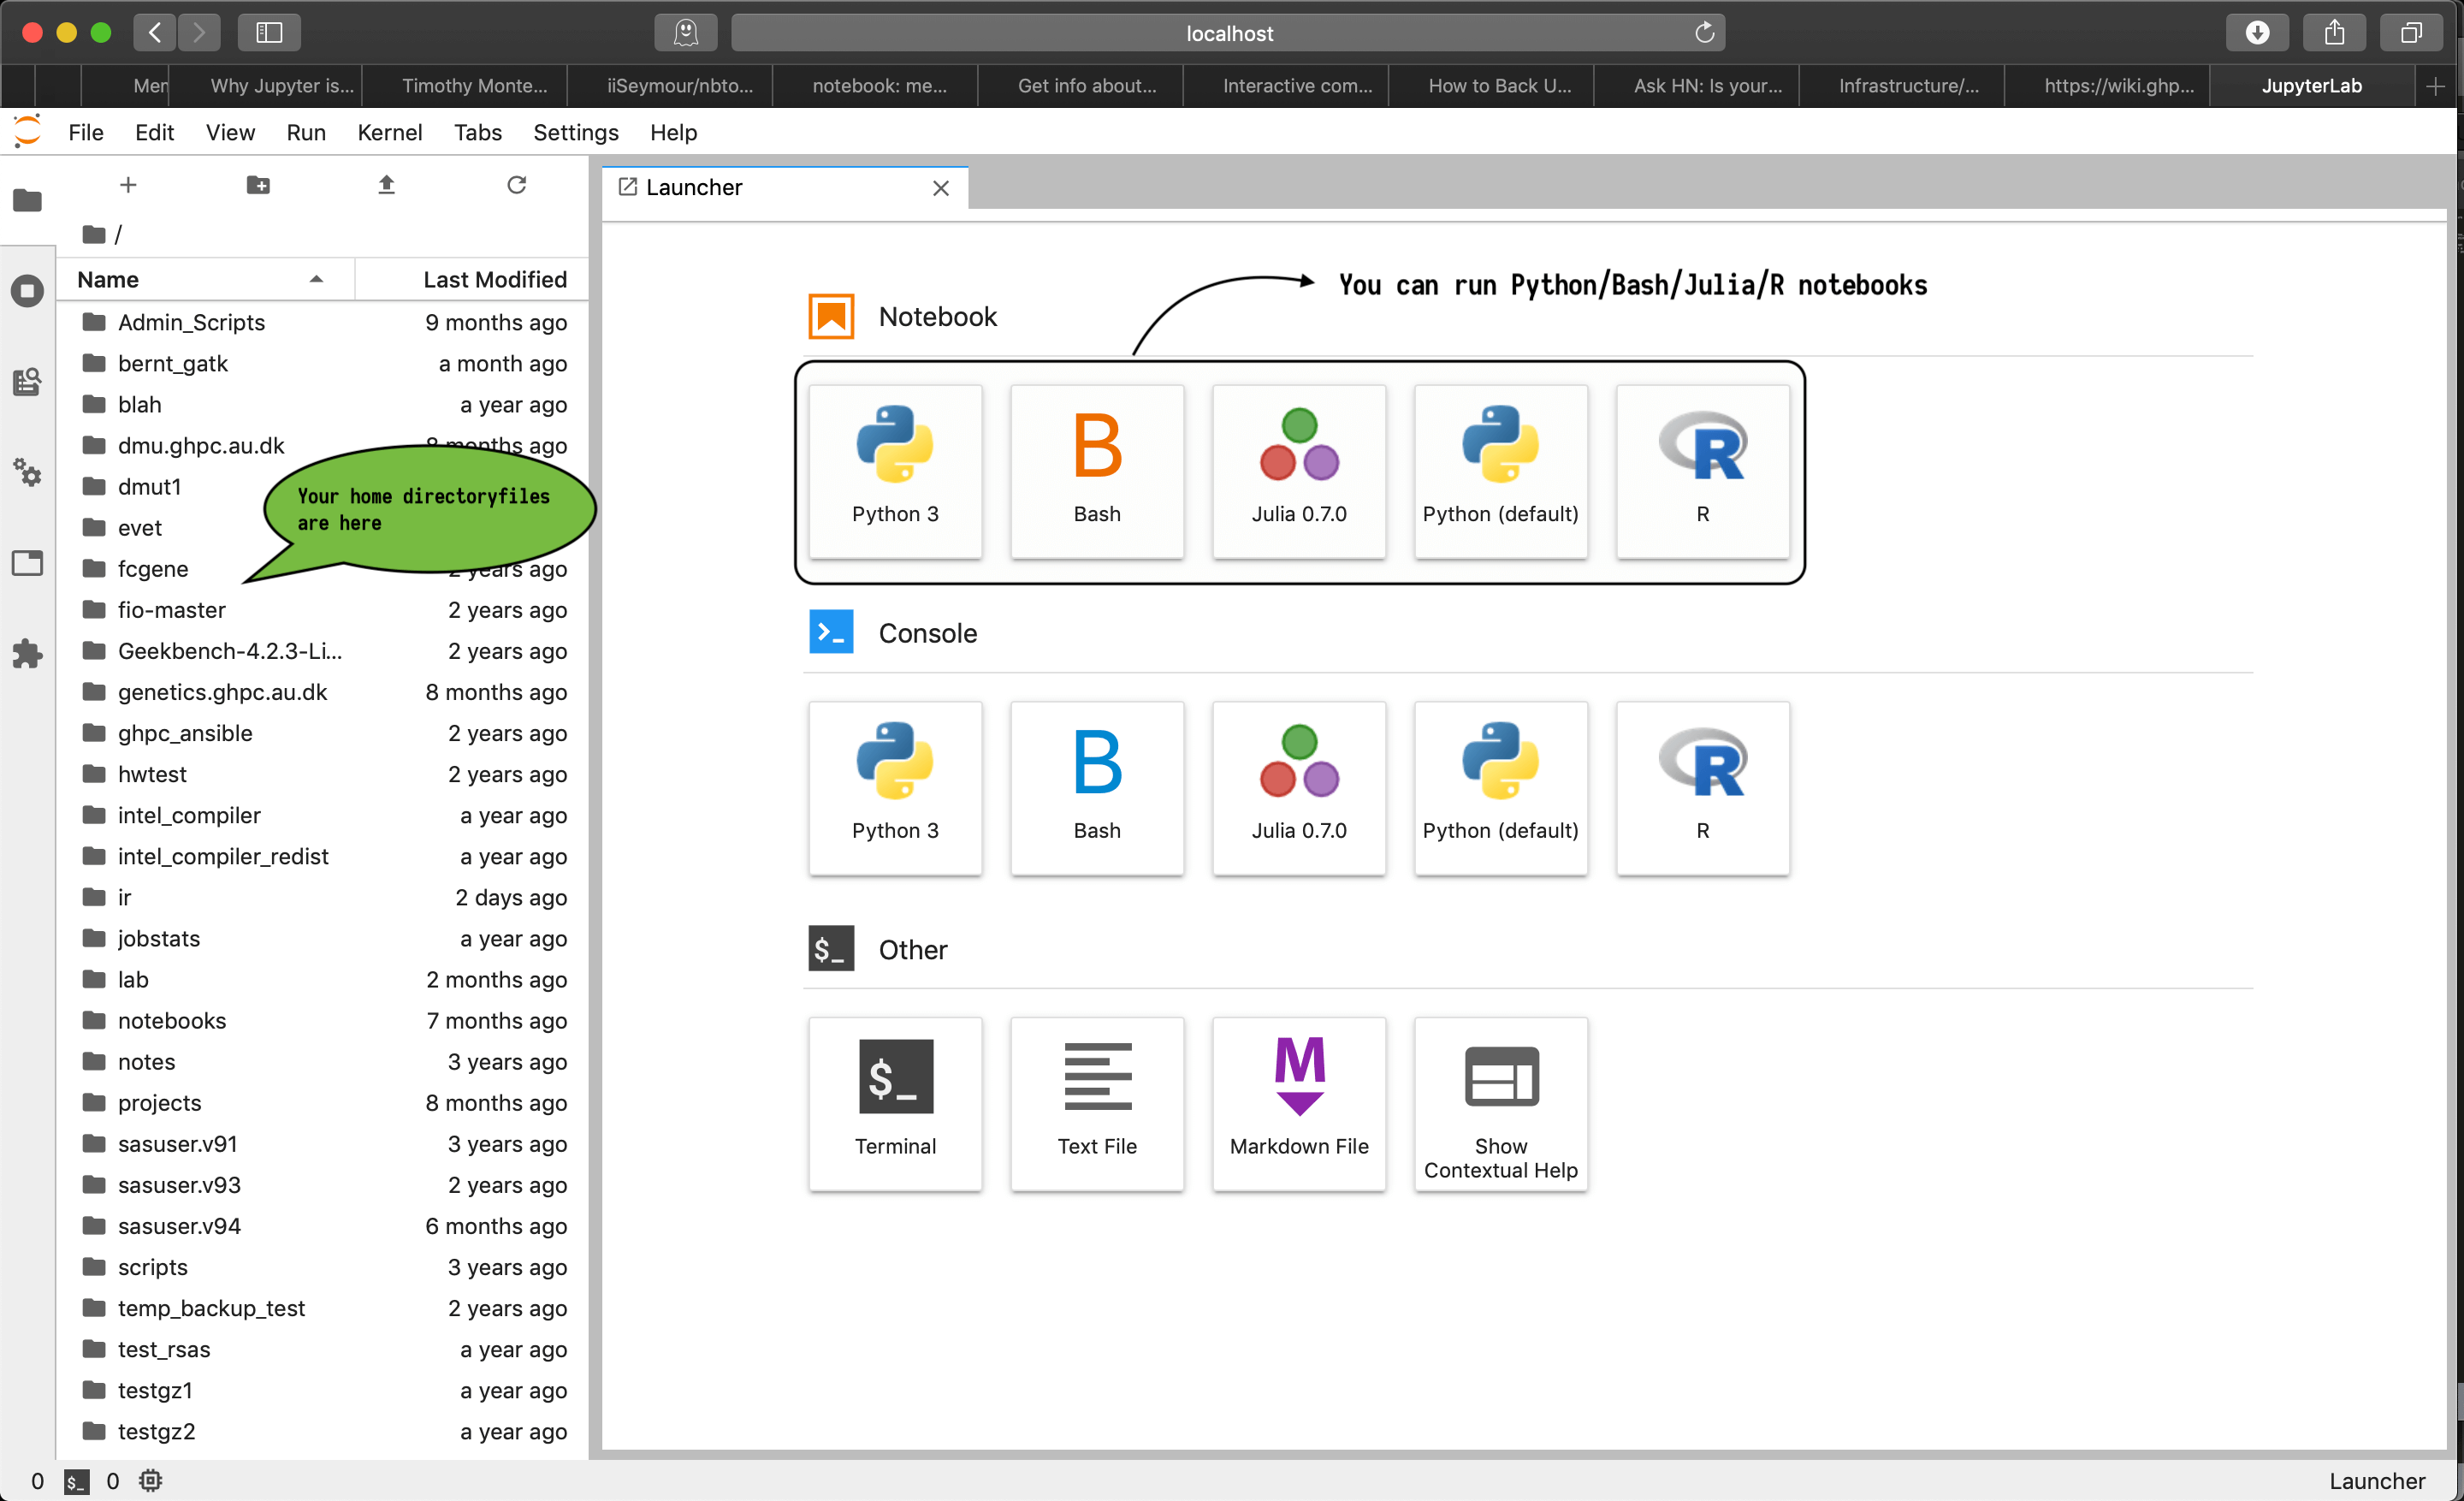
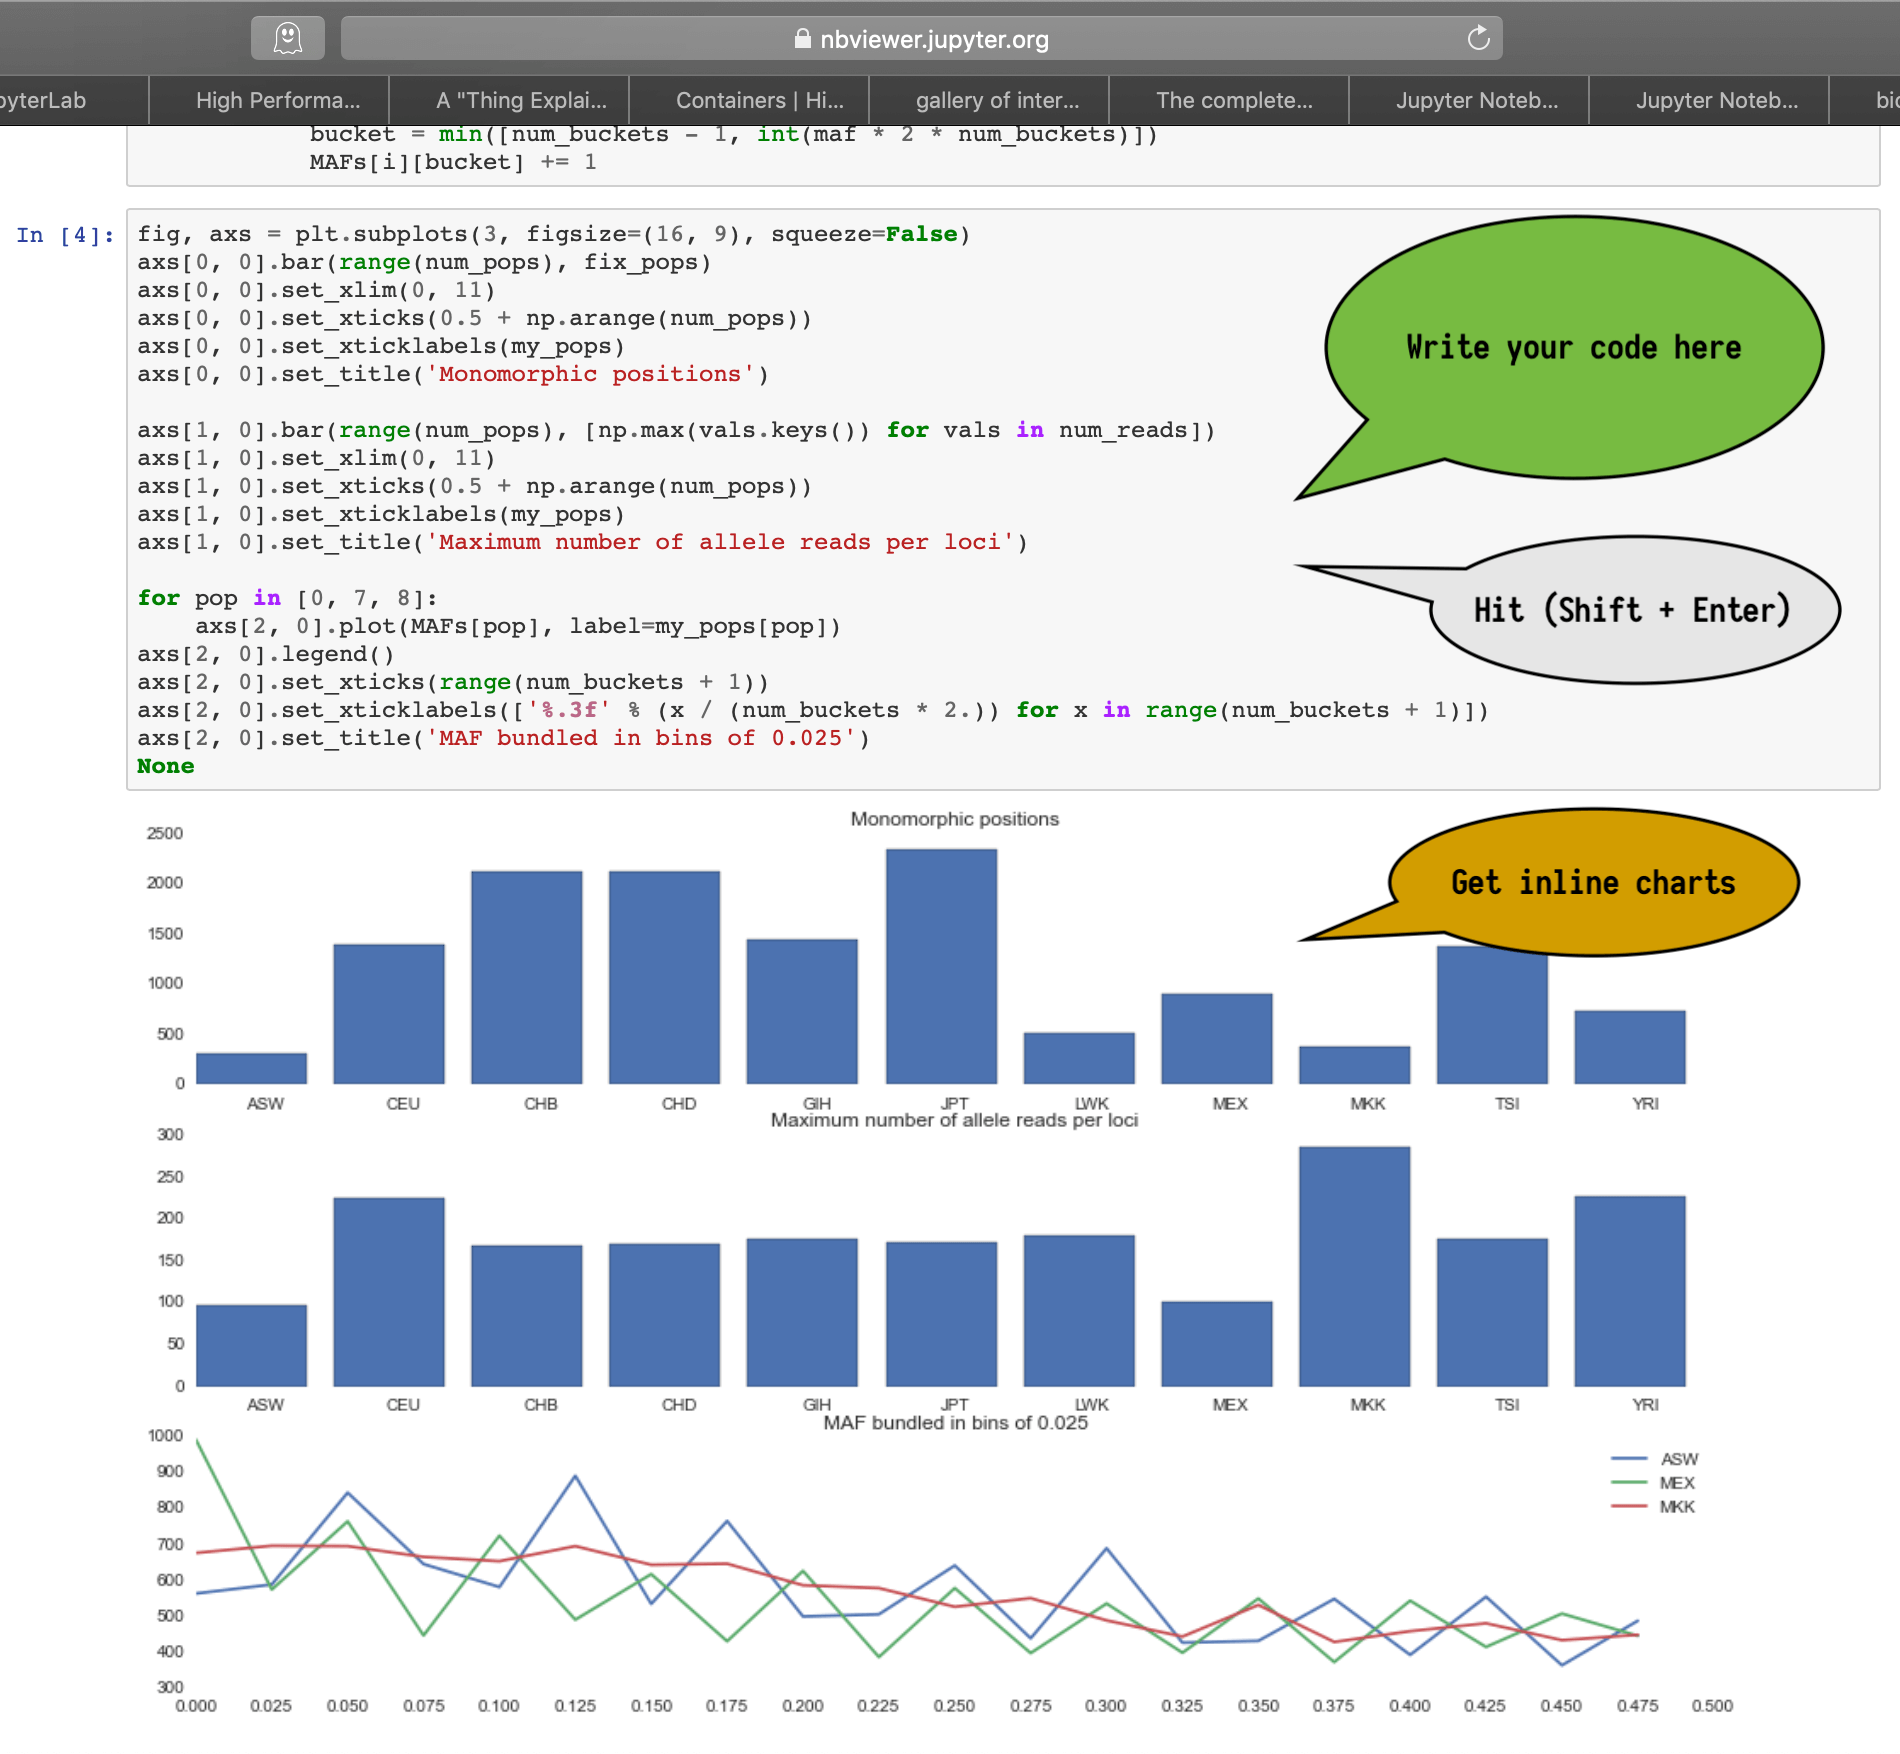
How do I login?
Jupyterhub is not a publicly accessible service at GHPC.
You need to set up a SSH tunnel and login as you normally would via SSH in order to be able to reach the Jupyterhub service.
 If you're a Windows user:
You probably already have a Putty session saved to access the cluster.
Open Putty, click on your saved session (in the screenshot - console1. You may have saved it with a different name), and hit the "Load" button.

On the left hand side of the Putty window - Category, click on Connection -> SSH -> Tunnels

Enter source port as 25263 and Destination as jupyter.ghpc.au.dk:8000 and hit the Add button.
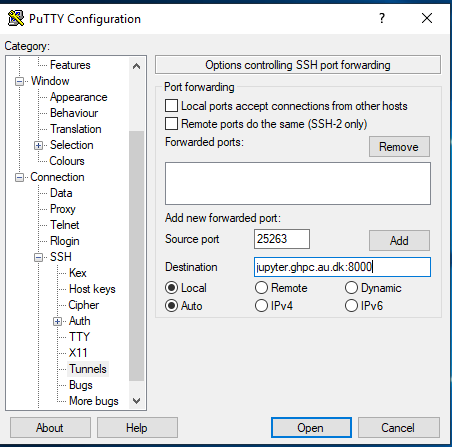
Once you hit add, it should look like this.
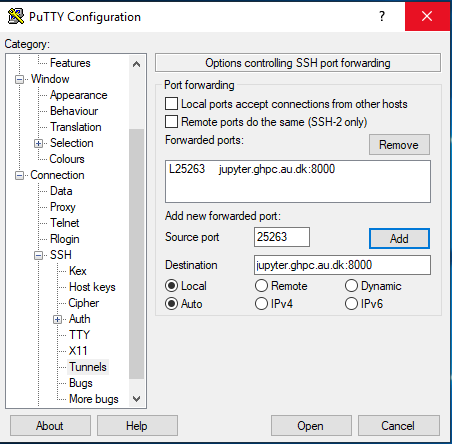
Click on "Session" on the left pane of the window to go to the main screen again. Now, click the "save" button.
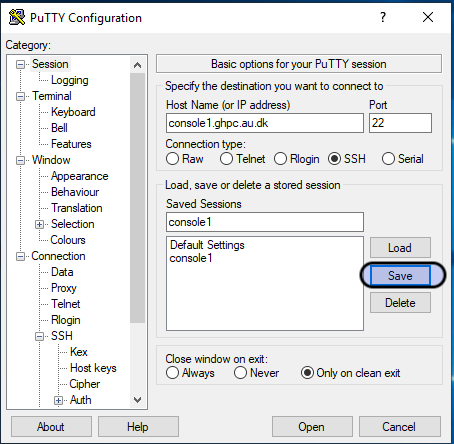
Now, you are all set with the tunnel. This was an one-time thing. From now on, you can simply click on the saved name and Hit Open.
Which leads to something like this - that you are already familiar with..
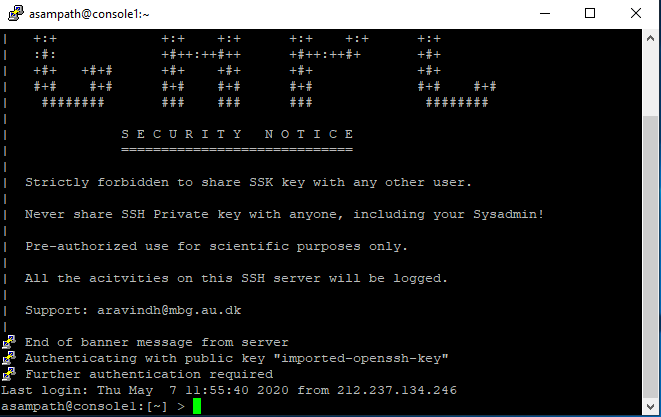
Leave it aside, and click on this this url (bookmark this if you will use the tool regularly).
This should lead you to ..
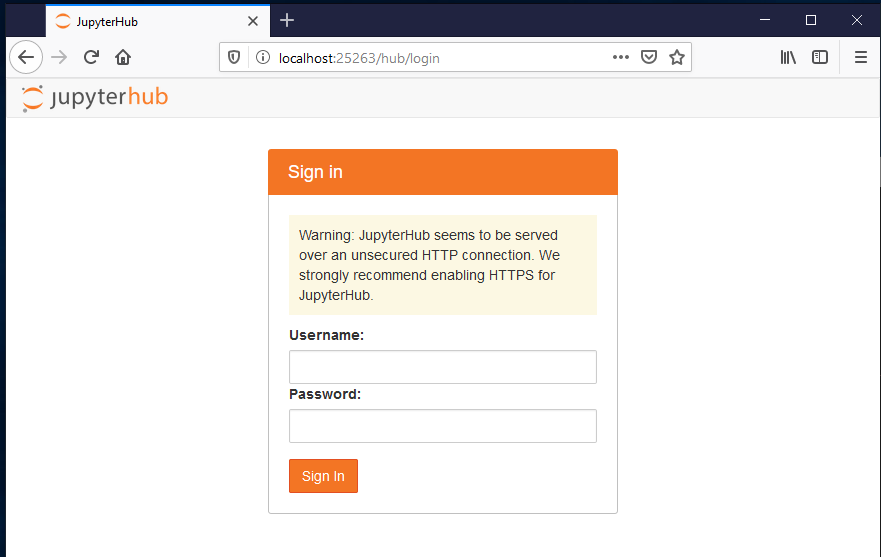
Login here just as you would with your username for SSH access. and password (that your sysadmin sent you).
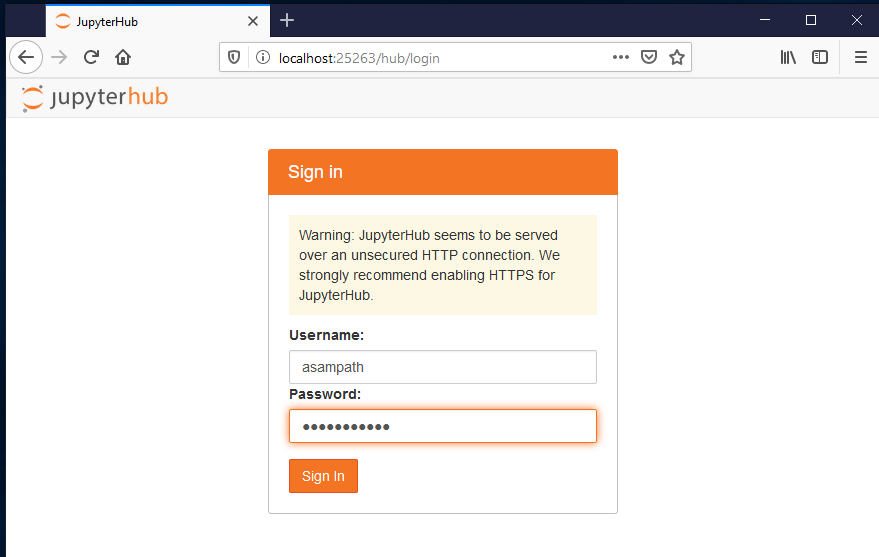
and it should get you to home page :
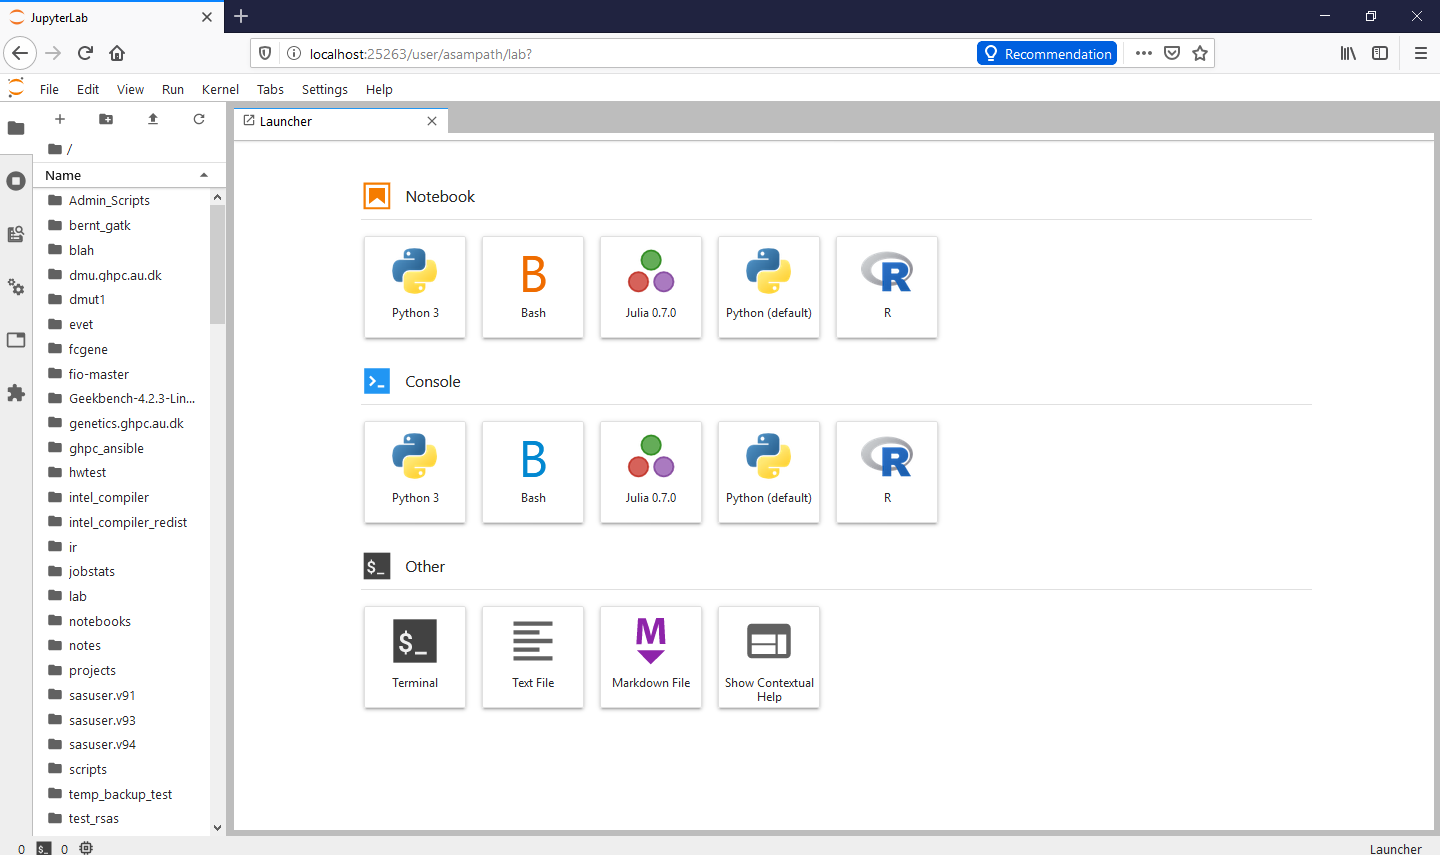
 /
/  If you're a Mac or GNULinux or Windows Terminal user:
Open Terminal or iTerm2 or whichever terminal program you use, and login via SSH, just that you include the tunnel in your SSH command.
Instead of
ssh <username>@console2.ghpc.au.dk
You should use
ssh -L 25263:jupyter.ghpc.au.dk:8000 -A <username>@console1.ghpc.au.dk
Leave that terminal window aside, and click on the link below to get started.. (bookmark this if you will use the tool regularly)
This should lead you to ..

Login here just as you would with your username for SSH access. and password (that your sysadmin sent you).

and it should get you to home page :

Okay, I'm in, but how do I use this? tutorial?
Creating Your First Notebook
Lets use Python notebook as an example, although the concepts are exactly the same for any language within Jupyter.
On Jupyter home page, under the "Notebook" section click on the "Python (default)" button.
This should get you to a new notebook that looks like below. Pay attention to its elements.
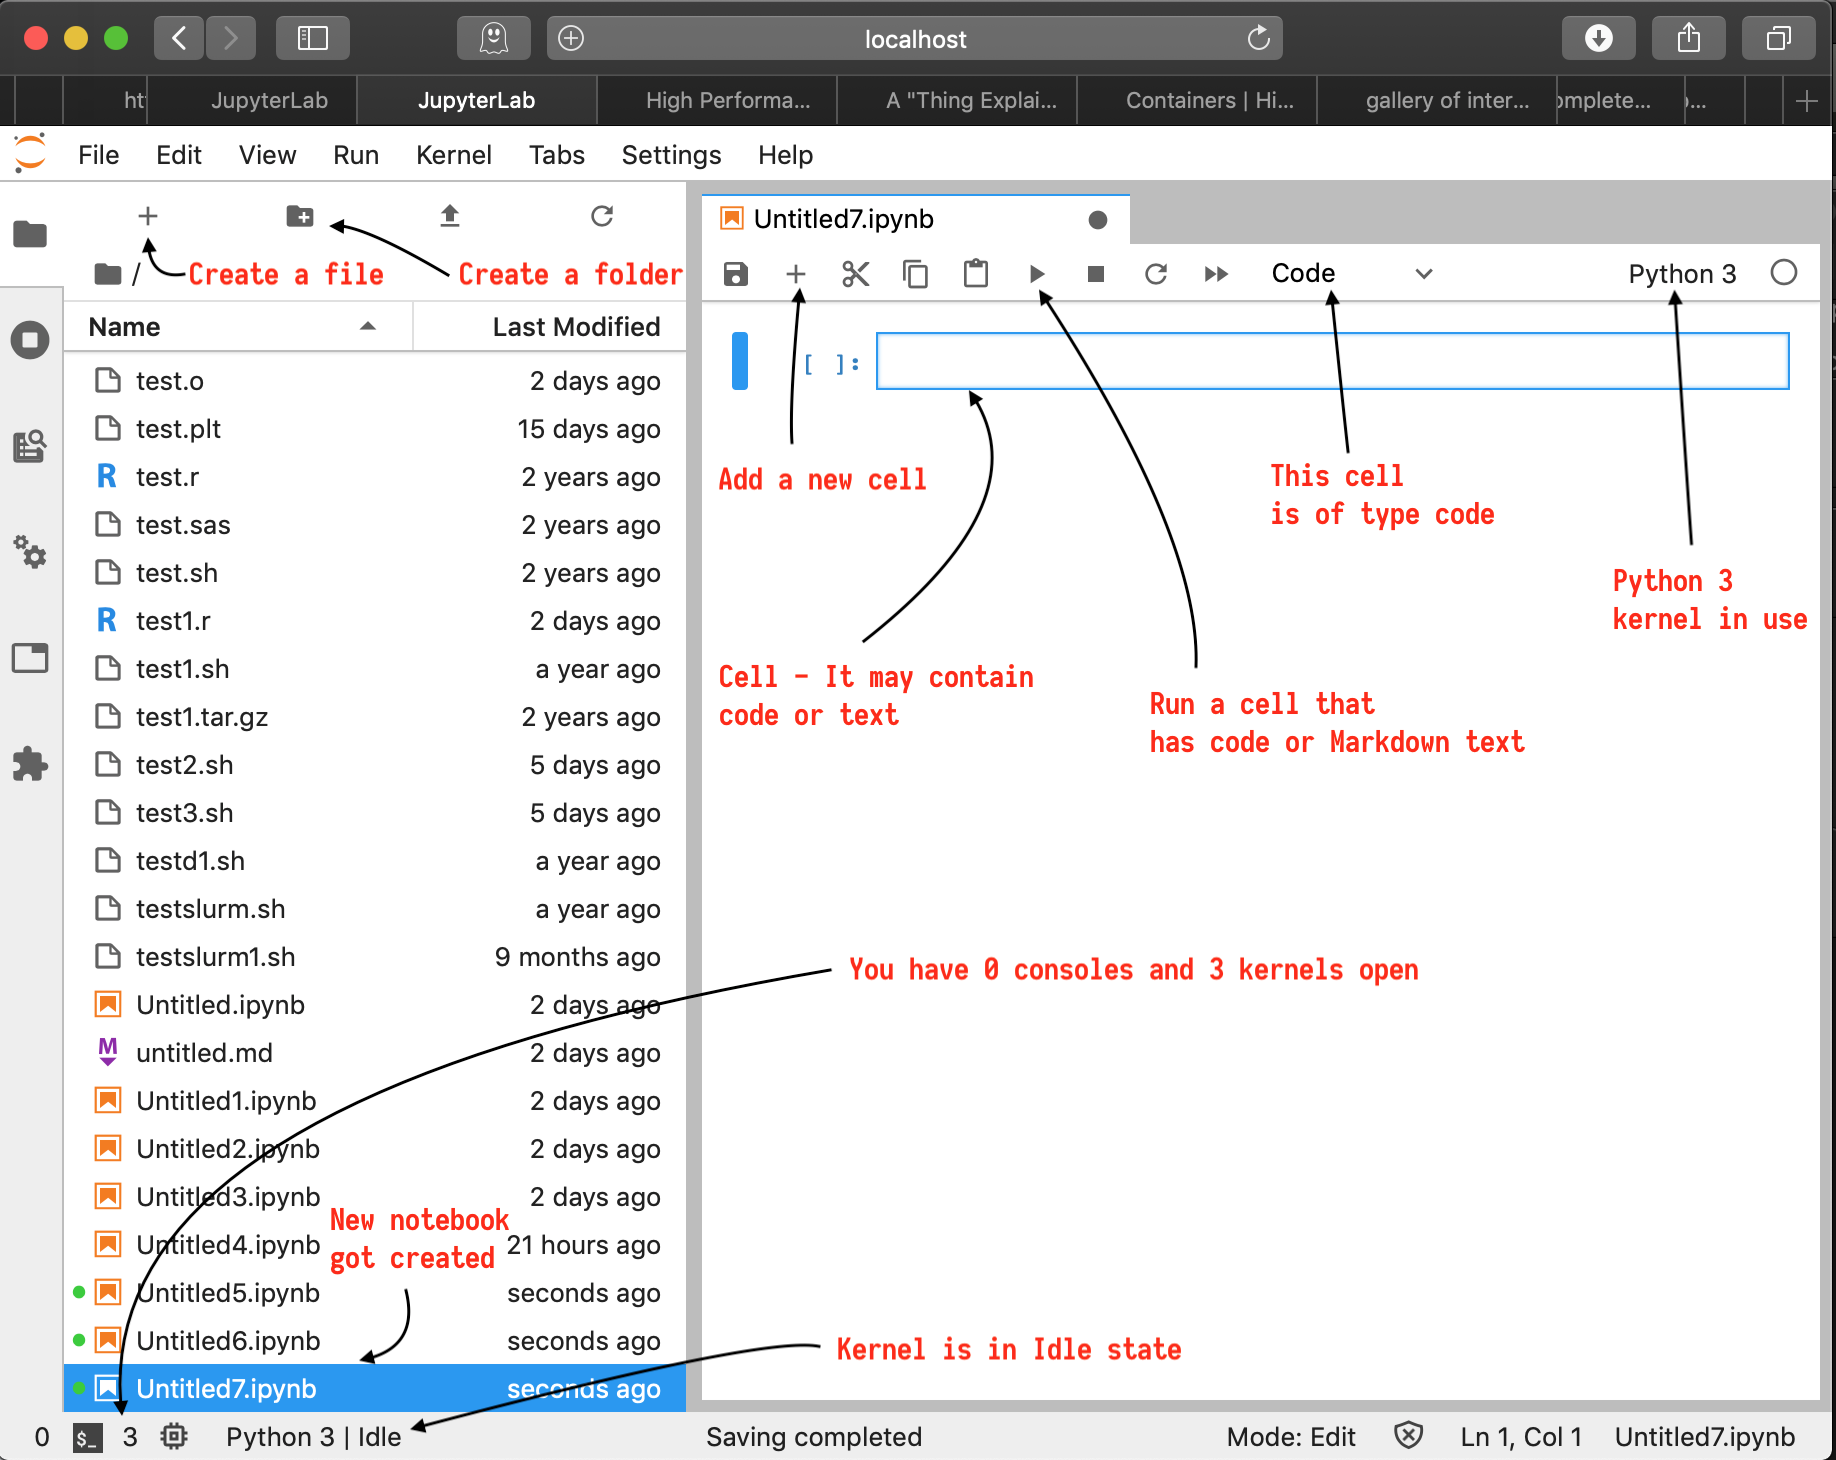
When you clicked on "Python (default)" button, it automatically created a new notebook for you and associated it with a "Python 3" kernel. Now, you can go ahead and use this notebook to write Python3 code and annotate with Markdown text and display charts and graphs.
What is an ipynb File?
Each .ipynb file is a text file that describes the contents of your notebook in a format called JSON. Each cell and its contents, including image attachments that have been converted into strings of text, is listed therein along with some metadata. You can save your work and transport this .ipynb file to other locations to "view your notebook".
The Notebook Interface
Cells form the key elements of the notebook. A cell is where you write code or text into.
A cell may be of two important types :
- code cell - used for code that will be executed if you run the cell.
- Markdown cell - used for text that will be rendered as Markdown if you run the cell.
For example, type the following Python code into a cell :
print('Hello World!')
and hit the  button or the keyboard shortcut (Shift + Enter) to run the cell.
You'd see the ouput inline as shown below.

Notice that the focus goes on to the next cell and you may continue with subsequent cells or go back and modify/re-run earlier cells.
The interpreter is waiting for you to code, while remembering all the executed cells. For example,
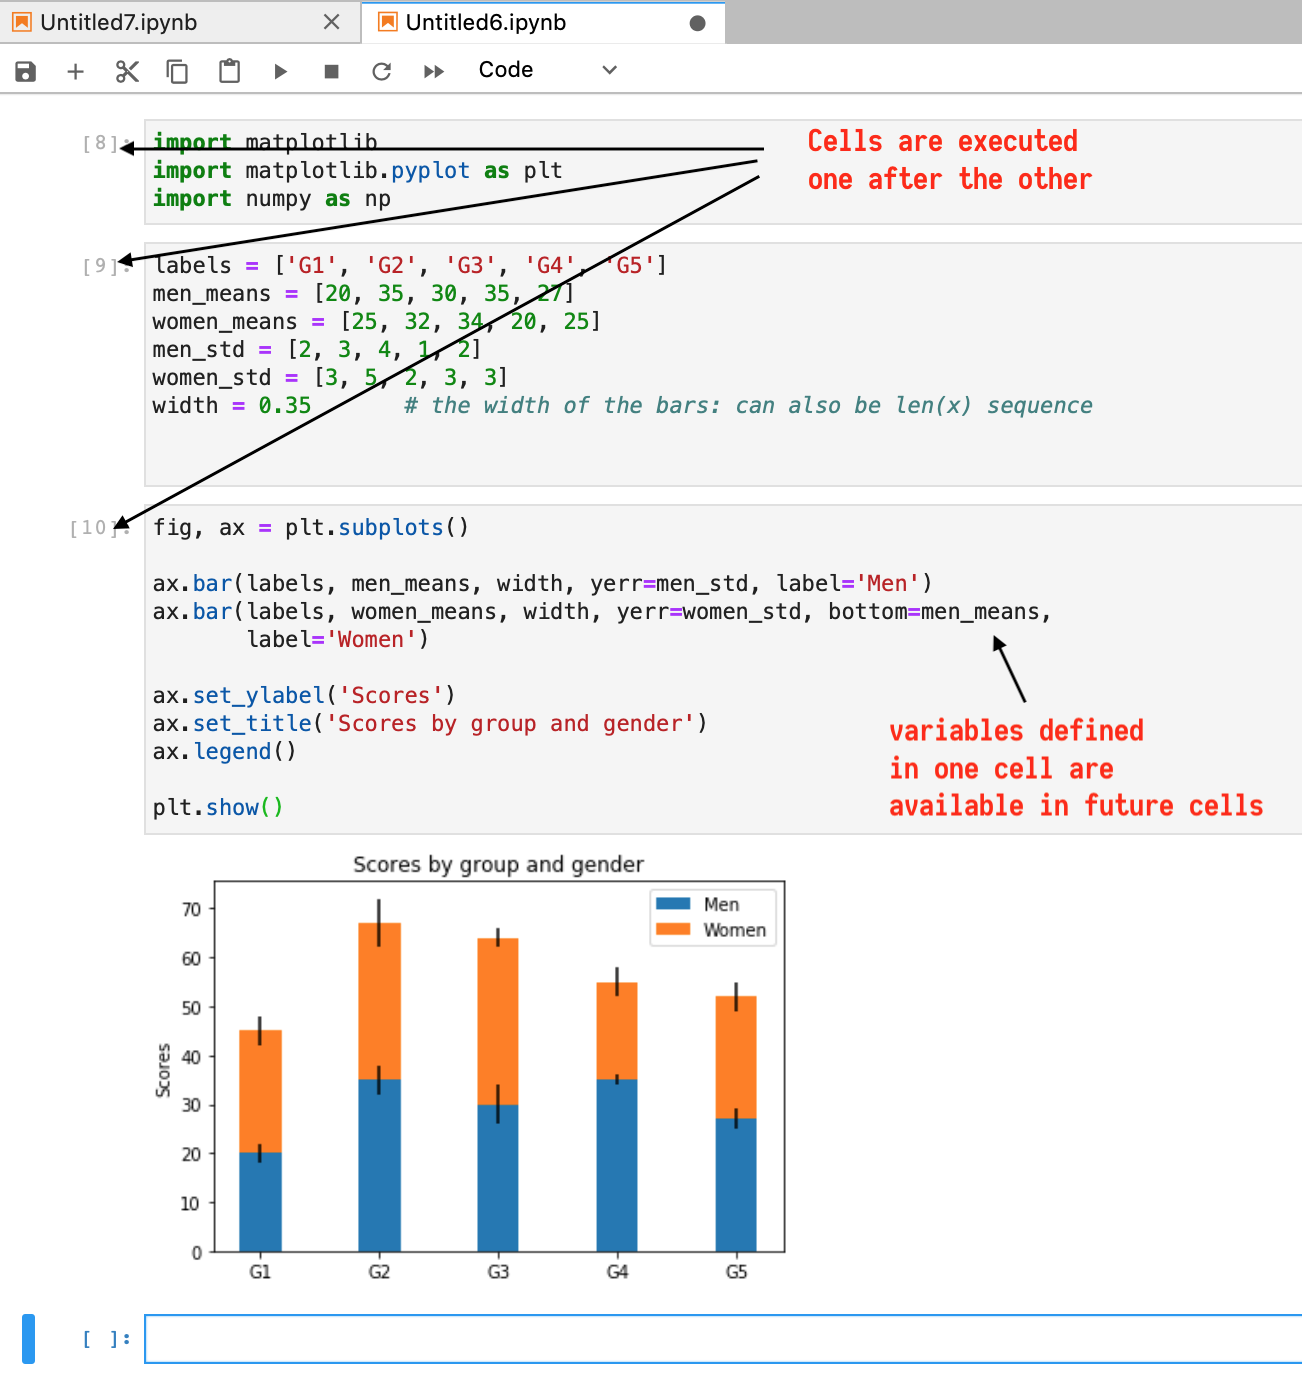
How about adding some text in your notebook using Markdown?
Click on the first cell, and hit the + button on the tool bar. This adds a new cell right below the current cell. You can drag it and drop it to the first position.
Now, try to change the type of the cell to Markdown.

Now, the cell type has been changed to Markdown and you can type in MArkdown text.

Just like the code cells, you can run the cell by using the run button or the shortcut Shift + enter. This will render the Markdown text as below.

Official guide of Markdown syntax is here: https://daringfireball.net/projects/markdown/syntax
You can explore the menus to do more things like
- Run all cells
- Run selective cells
- Interrupt the kernel
- Change to a different kernel
- Split cells
- Merge cells
- Rename your notebook file
- Import/Export your notebook etc.
These are left as an exercise to the reader. May Google be with you!